De-Crunching Telescoping Gauges
A bit ago, I picked up a super cheap set of (quite obviously) inexpensive telescoping gauges. They were in dubious shape, and very crunchy when I tried to use them, but for $5.00 , who was I to say no? This is the story of getting rid of the crunchiness and making them worth at least twice what I paid.
Cost
Just to put it in perspective, a single Starrett telescoping gauge pin can cost anywhere from $50.00 to $150.00 . Each. Mitutoyo and Brown and Sharpe are similar prices. Quite obviously my find isn't even in the same universe as those products, but it's also good enough.
What's Crunchy?
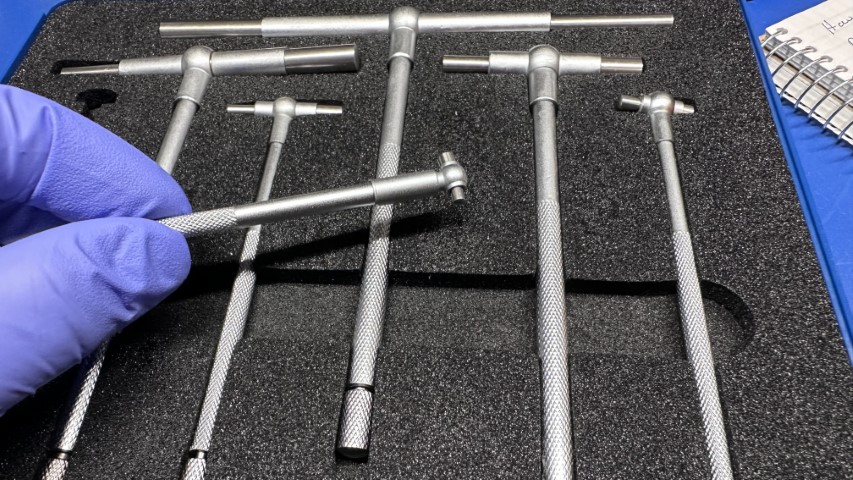
What do I mean by crunchy? First, let's talk about what a telescoping gauge is. It's a metrology device that is used to measure the inside diameter (ID) of a hole. There are other ways, such as inside micrometers, or even calipers, but there are many occasions where the hole is too deep, or perhaps too small, to be measured using other mechanisms.
Repeatability
I'm not a machinist, but I was raised by one. One downside to telescoping gauges is they aren't super repeatable across machinists. Once you have a feel for using a specific set, you can get pretty repeatable readings, but your feel and someone else's feel, are not super close when you're working at a scale that metrology concerns itself with typically (thousandths of an inch). Still, for most things, it's good enough.
To use it, there's a few steps:
- First, you need to collapse both the measuring heads by manually pushing them in, and then rotating the locking screw at the end of the handle counter-clockwise.
- Place the gauge into the bore with one head held in place against the wall of the bore. I like to use the larger of the two for this.
- Start to loosen the screw, but you have to go slowly because the rods are spring loaded.
- Tilt the gauge so the rods are slightly inclined and tighten the locking screw most of the way.
- Whichever end you lifted a bit above horizontal, force it slowly downward through the bore. As you do this, wiggle the gauge back and forth. This will allow the gauge to find its smallest size on the spring.
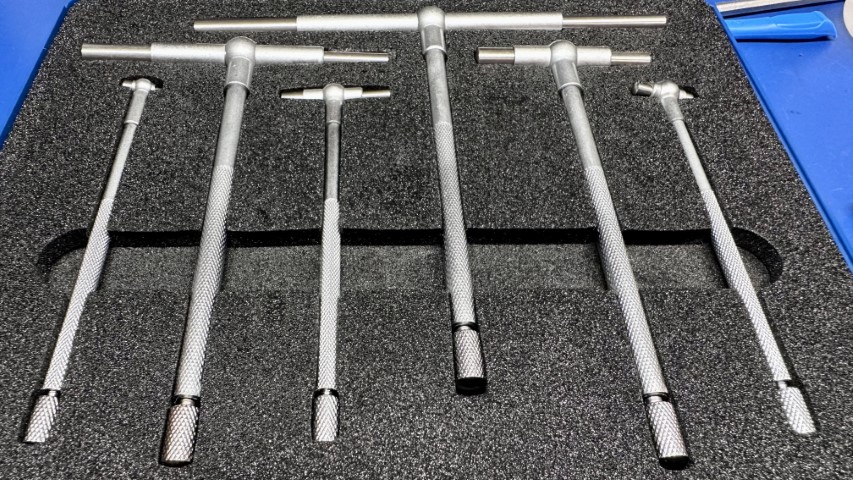
So, there's a few things that move inside the telescoping gauge:
- Each of the telescoping rods (plungers, basically) inside the sleeve.
- One or more internal springs that cause the rods to telescope.
- An internal rod from the handle that tensions the telescoping rods so they don't move.
- The end knob on the handle is running in screw threads.
These all felt dirty. Super dirty. You could hear a crunching sound when you rotated the handle or manually depressed the heads as though there was sand in the works. It's most likely due to the fact that the pieces were made quickly and without the final cleaning stage that is very manual, and therefore expensive.
Can we make them better?
Process
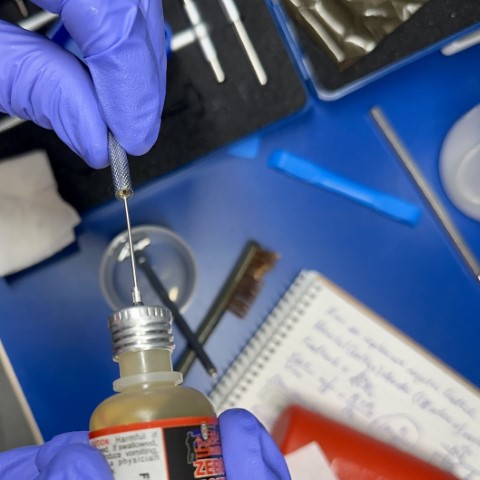
Here's the process I followed. First, I disassembled the gauge, removing the knob at the end and the rod inside. I wiped the rod down with some IPA. Then, because I knew there were clearances inside the gauges, I flushed the inside with IPA:
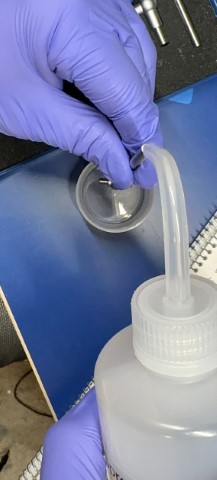
Then, I let them set in a bath of IPA for a little while. While they soaked, I cleaned the end of the knob's screws with a brass brush and more IPA:
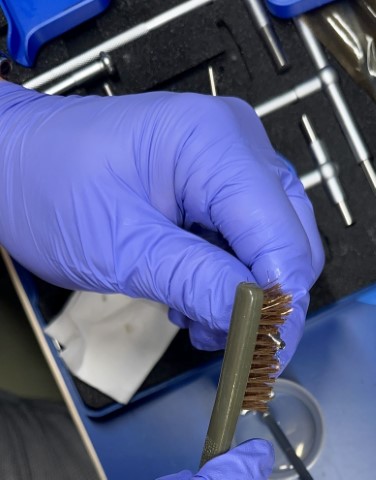
That, plus a few wipes with clean cloths/rags/wipes got a lot of miscellaneous debris off the threads, which were by far the crunchiest thing.
Next, I flushed the inside of the handle out with canned air. This caused residual IPA to go everywhere. Fortunately, it evaporates quickly.
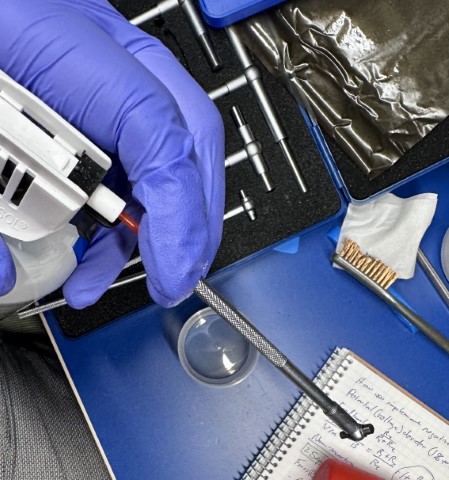
Then, just add a couple drops of a reasonable lube (this one is designed for moving surfaces in firearms). Two to three drops should be plenty.
And after wiping it down, and repeating 5 more times, I have a box of gauges that are passably clean and usable.
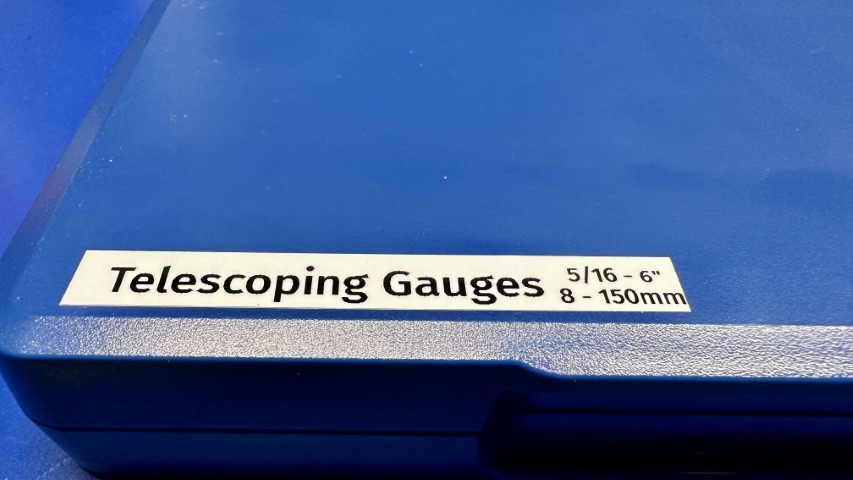
Now they just need a quick label.
So how are they?
Testing
Laughable Precision Overkill
I am using a 3D printed part for this, for which a micrometer is laughable overkill. I know it's overkill. But it's nice to know just how bad the prints are to at least 1/2 a ten-thousandth of an inch
Finally, I wanted to make sure they worked reasonably well now. I pulled a 3D printed tap guide I made out, and tried it out.
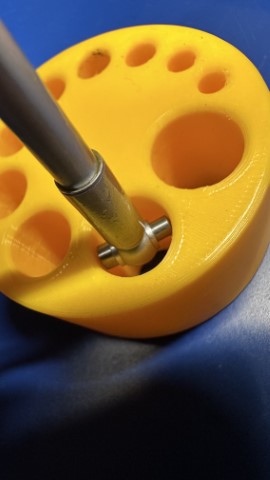
After locking it, I pulled it out and measured it with a micrometer.
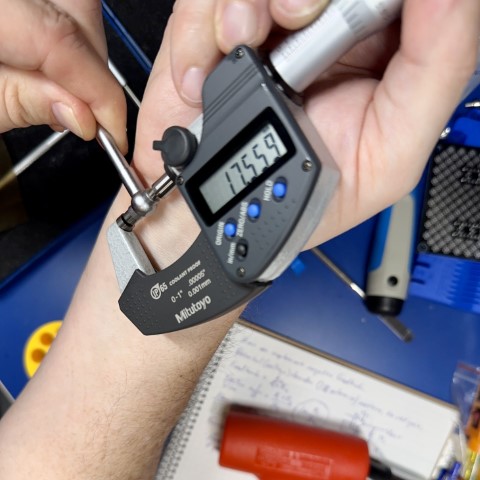
The hole measured 17.559mm, versus the 17.75mm it was intended to be. That's about what I would expect in overage for a fused filament printer.
Are they great? No, I've used Starrett telescoping gauges, and there's simply no comparison. But they are better than they were, and they are 1/100th of the price.
Comments or Questions?
If you have any comments, questions, or topics you'd like to see covered, please feel free to either reach out to me on Mastodon (link below) or open an issue on Github.