Replacement Microscope Base
| Key | Value |
|---|---|
| Problem | Lack of stability and magnetic property of video microscope stand |
| Skills | Drawing, basic tools |
| Tools | Basic tools, metric hole taps |
| Cost | $75.00 |
This isn't meant to be a review of the video microscope that I use (a Joyalens JL249MS, also called Adonstar AD249M). Instead, this is about an improvement that I made to it recently. One of my frustrations with the microscope, which is overall excellent, was the light-weight aluminum base. It was both insubstantial (something you don't want in a microscope), and non-magnetic, which prevented me from using my favorite holding tools. So, since the the overall design was just 2 holes in a plate, I decided to make something better.
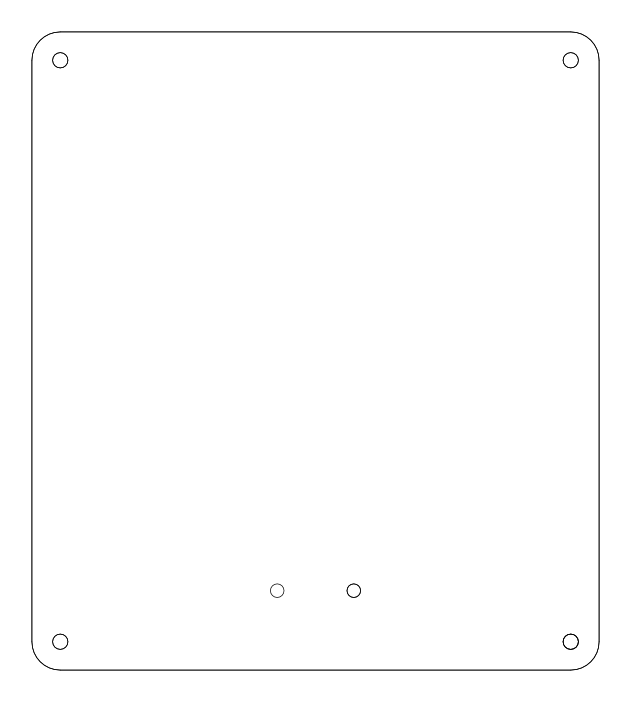
Since I needed it to be magnetic, I turned to my old friend, steel. I designed a small replacement that also had holes for 4 adjustable self-balancing feet. To do this, I did some quick measurements, and created a quick 2D file in DXF format (joyalens-replacement-base-v1.dxf ). I then shot it over to SendCutSend to be manufactured in 1/4" (6.3mm) hot-rolled pickled and oiled A36 steel. This was then powdered coated in matte black to reduce any reflections in the lens.
While I waited, I put together a quick order for everyone's crack dealer: McMaster-Carr. This meant:
- Swivel leveling mount in yellow-zinc with a rubber cushion and M6 threaded hole (P/N 6120K38)
- M6x1.0-10mm alloy steel flanged button head screws in black oxide to keep the finish matte (P/N 92137A525).
- TiN-coated HSS M6x1.0 plug tap (P/N 26475A74). While I had a tap for this, it was an excuse to upgrade to a much higher quality one that will last a long time.
In addition from my stock, I pulled M6x1.0-12mm hex cap head screws.
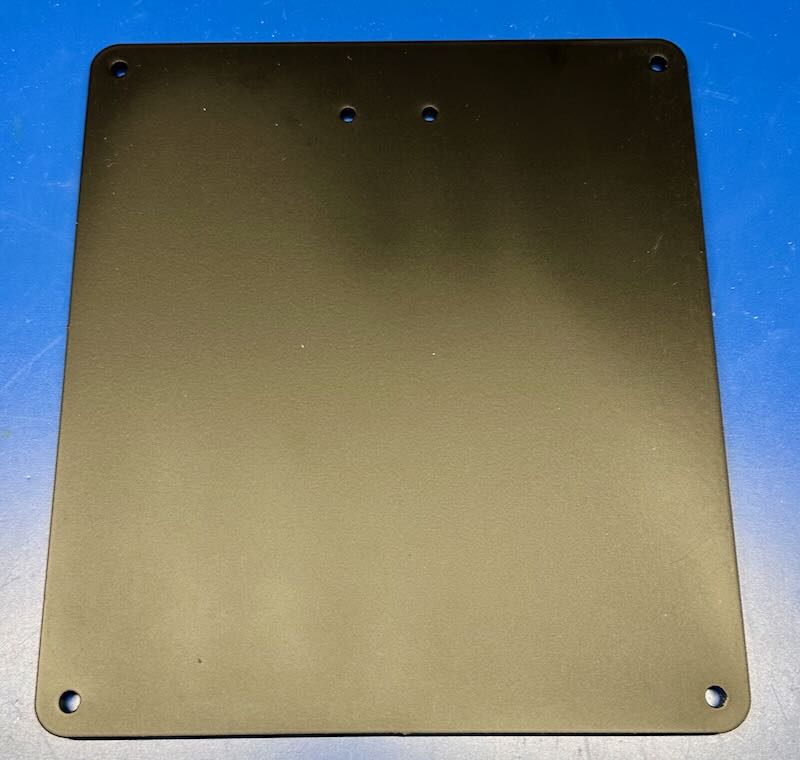
The custom cut and finished steel plate took a couple weeks to work its way through production and shipping, and finally, I was ready to re-assemble the microscope. It was also much heavier than the original, being 5lb (2.2kg) versus < 1lb (450g).
The first step was to tap the M6 holes for the feet, which I did... using my old janky tap, and not the fancy new one I had bought, because I forgot I bought a new one. C'est la Vie. It worked fine, if just a bit slow because the steel isn't as sharp as the new one would have been.

Next, I screwed on the new feet with the new flanged screws. The original plate just had some rubber feet on the bottom, but these are substantially more secure, and are largely self-leveling. They have a nut that you can use to snug up and ensure they are properly level. I just screwed down all the way and tightened them up, without really paying much attention, figuring I'd need to re-level it after anyway.
I used a quick check with the level to ensure everything was fine:
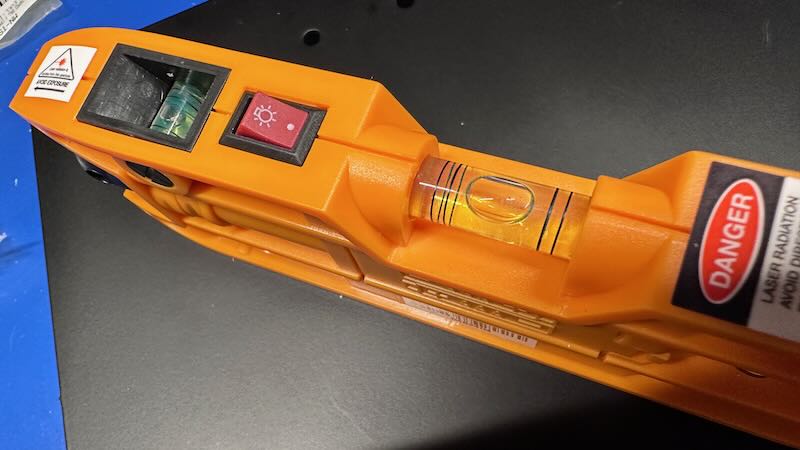
Ta'da! No leveling needed. Everything was "flat enough" for my purposes. Machinist friends would certainly scoff, but it works for what I need it for, where it's not really a reference plane to anything else.
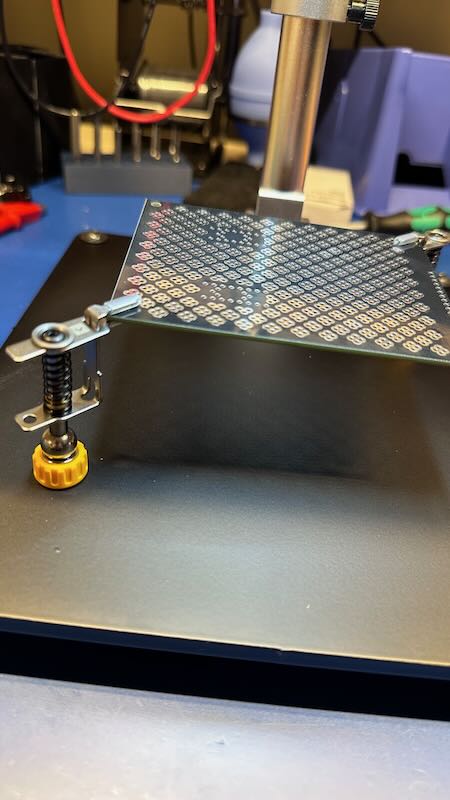
Finally, I screwed in the support for the microscope head (with the M6x1.0-12 screws), and Bob's your uncle. I threw one of the neat IMSA Guy HP-reproduction analog protoboards to see how it worked:
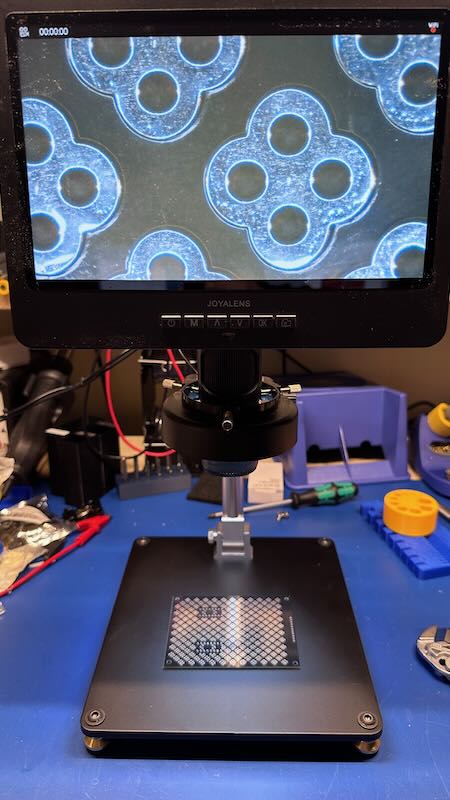
Perfect, and exactly what I was hoping for. But that's just a heavier version of the original, so how about those fancy clips?
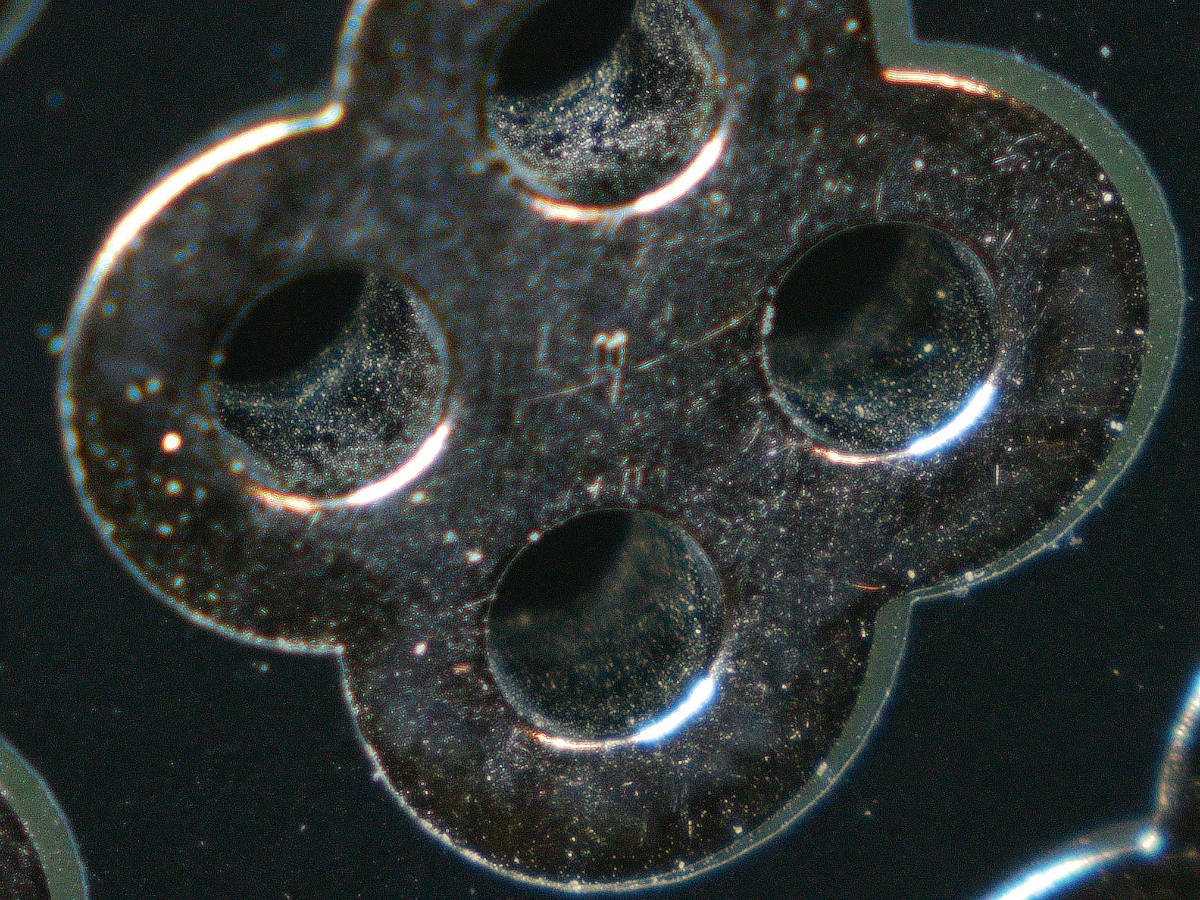
Perfect. So let's take a look at this super neat analog protoboard. This was taken with the microscope itself, and I've actually reduced the resolution substantially to make it a bit more manageable.
100% worth every dime (about $75.00 for the plate and parts).
Comments or Questions?
If you have any comments, questions, or topics you'd like to see covered, please feel free to either reach out to me on Mastodon (link below) or open an issue on Github.